Set up your First React-Native(Android) project on Windows
Setting up your first React Native project on Windows is not that simple. You really need to install a lot of stuff. In this article we will go through all these installations and set up your first react-native project on Windows:
Below are the required installations:
1. Java SDK: (this is not a prerequisite for react-native, but this is required for running Java apps/android apps)
Link to install Java SDK: https://www.oracle.com/in/java/technologies/javase-downloads.html
Once you are on the page, choose the Java version you need to install. Once you click on the Java version, it will take you to the specific java version page. There you can choose your windows operating system and click to download the .exe file. In my case I installed Jdk 8 for my windows 64 bit OS:

Once the download is completed, click on the downloaded .exe file and start the installation process. You can leave the default selected options as it is and finish the installation.
2. Install Nodejs.
Nodejs is basically required to run your javascript code outside the browser. We will be installing the node for two reasons. First, we want Nodejs to generate our application bundle js and serve it to our mobile device, and second to use the node’s package manager npm to install/manage packages for our application development.
Link to install Nodejs: https://nodejs.org

Once you click on the link above, you will get the above.
You get the download link there itself. it’s up to you, you can either go for the LTS(stable) version or the current version. I installed the current version because it has the latest features. Once downloaded, click to install. It's a pretty fast installation.
3. Install Python 2
Link to install Python 2: https://www.python.org/downloads
On the link, we are prompted to download the latest version of python. But we need python 2x and not Python 3.

Download Python and Run it. And we will have Python installed in our system.
4. Set up Android Studio:
Link to install android studio: https://developer.android.com/studio
We will get the Download link. This is not a small installation. It's going to take some time:

Click on the downloaded file to install: This installation will take some time as well.

During installation, at some point we will get the below window, pls note down the Android SDK installation location. We will need it later.
For me it was C:\Users\Computer\AppData\Local\Android\sdk
For you, it could be C:\Users\<yourusername>\AppData\Local\Android\sdk for your particular machine.
We are not going to change anything here(just going to note down the path for later use), and click next.

As this installation takes place, let's check few installations
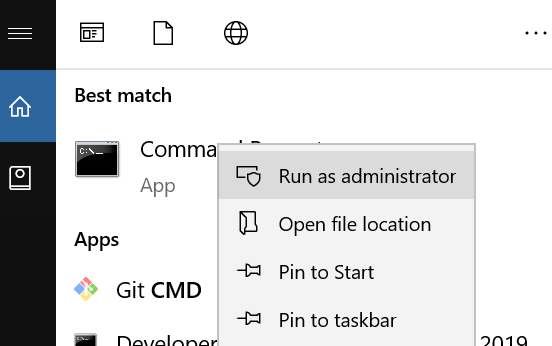
On your windows search type ‘cmd’ and run it as an administrator:
We will first check if NodeJs got installed or not in our system. To do that we type node -v in the command prompt. We should see some version there.
In case you, see node is not recognized or no version printed, means Nodejs is not installed. You need to check and install it as mentioned in this article above.

5. Install the react-native command-line tools
The react-native command-line tools serve two purposes. First, it generates a new react-native project about which we are concerned right now and its second purpose is to test our project inside the Android simulator. A simulator is a device that looks like a real android device and helps us test our project as if, we are on a real mobile device.
We can install the react-native CLI by running npm install -g react-native-cli :

Now, we are going to generate our new project. Generally, when the command prompts opens in admin mode it opens in C:\Windows dir structure as seen above.
But it's not recommended to have your own project in that folder, so you can take yourself to any other drive or any other dir structure that you would like to use as your workspace.
So first navigate to your workspace:

And once you are into the place where you can store your react-native application, use the react-native command line CLI that we just installed.

So the first part here is the reference to the command line tool that we just installed. The first argument to that is the ‘init’. It initializes the new project. The second argument is the name of the project i.e. albums in this case. You can give any name to your project.
So once you hit enter, it will start creating your new project, it will definitely take some amount of time.
Once the installation is complete, you will see some instructions like these at the end:

But before moving on to run the new project, we need to do a little bit more setup.
6. Open Android Studio and set up the Android emulator
Open up the android studio, and open your “albums” project from your project folder. Select the android folder to open in Android Studio.

Once the project is opened in Android Studio if you get any error messages while the project Gradle builds. Do as stated/suggested to install any packages if required. A click on the suggestion will do that for you in android studio.
We need to create an android emulator.
Android Studio->Tools->AVD Manager

Click on the “Create Virtual Device” link on the pop-up that appears.
Just to brief you, a virtual device here is an Android emulator, an android system inside your windows machine. It will help us to test and see how our app would actually look on a real android device.

Select a device and click Next.

Select the API level. This will depend upon the react version. It supports till which version of Android API basically.

Click “Next”.

On this screen, you do not need to make any change, let the default settings be selected, it basically gives info about the device. Click “Finish”.
Next, you will see the screen like below:

Click on the Action (green arrow) to start and run the emulator.

It will take few seconds and your emulator should be up and running like above.
Before we actually start running our first react-native project, we need to add some system variables.
7. Setting System variables
- We need to add a JAVA_HOME system variable. If you already have it, no need to add it again.
It is required because by default a react-native application needs access to the Java Program in your system.
Go to Windows search, type “system settings”. You will see:

Click on Advanced -> Environment variables.

Click on “New”. A pop-up for a “New User Variable” will come. Enter the variable name as “JAVA_HOME”. For the variable value, click on “Browse Directory”, then traverse to the Java(jdk) folder in your machine.
Mostly it should be C:/ProgramFiles/Java/jdk.8.0_281, but could change as per your installation path.

Finally, click “OK”. Now should be able to see the JAVA_HOME variable.

2. Another variable we need is to edit the Path variable. Click on the Path variable and click Edit.

Again click on Edit and add the below value:
The path will be the path for Android SDK platform-tools in your machine.
For you, it should be: C:\Users\<YOUR USER NAME>\AppData\Local\Android\Sdk\platform-tools
Before putting it, just verify if that the dir exists in your system.

Click “OK”, “OK” and “OK”.
And then the last thing we are going to do is restart the command prompt.
Close the command prompt and start it again. Run it as an administrator.
Now we are actually ready to test our application inside of an emulator.
Change to your project dir inside the command prompt.

Now the very last step, once you are in your project dir.
8. Finally Run your react native project on android
react-native run-android

Once we run this command we will see another window pop up. That is the react package manager. That will take all our javascript code and compress it to a single javascript file and makes it available to the android device.
And back in the original command prompt window, our application is going to install and open it on the android device.

Thus, we are finally able to start, run and open our app on the android device.
We haven’t put any code inside it, it's just a basic react-native setup project.
During development, if you make any changes in your code, you just need to Double-tap R on your keyboard to refresh the app and see the changes simultaneously.
Bonus Section:
In the above section we completed all the required installations for setting up the react native project and ran the project on an android device
In this section we will come to know how to and where to start coding in this project.
So, now you might be thinking, we have done so much to start and run our app and what when we close everything, say shut down your machine for the day or take a break from your work. How do we start working and running up our project the next day?
Open up the android studio> open up your project.
Open and Run your emulator from the android studio (Tools->AVD Manager->Run your emulator)
Then in the command prompt change to your project dir react-native run-android
Thus these are the two steps that we need to do if we close our project and want to start and run it again.
It’s time to write some real code now:
Once we open up our project in an editor of your choice (I am using a Visual code here) you will see the below dir structure:

All these folders and file structures are created by the react-native CLI command.
Android & IOS: React-native CLI commands create two folders to run our app both on android and ios systems
node_modules: this folder contains all the javascript dependencies of our project
Next, we see a number of configuration files, we are not going to touch any of them now.
A little lower below, we see a file “index.js”. This is the root or the entry point of our project. If you double click and open this file, you will see below content. It is created by react-native CLI.

Whenever we create a react-native project, we create multiple components, it is necessary to register at least one component, that will be our main component which will be calling or executing other components from it.
From the code above, index.js is registering the “App” component. Thus all your code changes should go through the App.js file.
Here is the link to this react-native setup project in GitHub:
https://github.com/agarwalreshmi87/React-Native-BasicStructure
I hope this article helps you to set up your first react-native project. Trust me, I spend a tremendous amount of time understanding what are the essentials to start up a react-native project, and hence I wrote this one.
Happy Coding :-)